25th Anniversary

25th Anniversary

Wednesday, September 14, 2011

Wonderfully Wicked Wednesday, #29

Hi, all!  Here is my entry for WWW this week.  I used the new Gently Falling set from the Holiday Mini Catalog.  The theme for this month is Scarecrow, and things to do with autumn.  I thought this looked like the perfect boutonniere for a scarecrow, don’t you?

IMG_2327

I used Soft Suede for the card base, Pool Party for the mat, and Very Vanilla to stamp on.  The background is the “En Francais” stamped in Calypso Coral ink.  It’s hard to tell, but I sponged it with Pool Party ink as well. 

The leaf outlines are stamped in Crumb Cake and the fill-in is stamped in Pool Party. The acorns are outlined in Crumb Cake and filled in with So Saffron. I used a neutral Designer Button tied with linen thread.

The Thank You stamp is from “Day of Gratitude” and is stamped in Soft Suede ink on Pool Party Cardstock.

Hope you enjoyed this week’s card.  Have a great week everyone, and try to get your fingers inky at least once this week!

Wednesday, August 31, 2011

Wonderfully Wicked Wednesday

Welcome! It’s the last week of our Somewhere over the Rainbow theme.  So, I started singing the song in my head and thinking about what you find over the rainbow, and came up with birds, melting troubles, and daring dreams.

Incorporating the bird was easy with our 2-step Bird punch, and Word Play’s “Wish Big” was a natural for daring to dream.  The troubles melting like lemon drops was a little more difficult, and I’m still not completely pleased with them, but I procrastinated too long to have time to tweak it anymore! :) 

IMG_2319

Soooo… Here’s what I used:  I used the Small Oval Punch  and the Calendar Alphabet and Numbers stamp set to make a row of lemon drops spelling out “troubles,” and I used the rain drops stamp from “My Friend” to show them melting away.

I’m still not completely happy with this, and I think I would like it better if I’d used a different color ribbon.  Maybe an orange or a red.  Didn’t have those colors on hand, though, so white it is!

Here’s the complete list:

Cardstock: Tempting Turquoise, Whisper White, Real Red, Tangerine Tango, Daffodil Delight, Lucky Limeade, Pacific Point, Concord Crush, Silver Glimmer Paper

Ink: Real Red, Daffodil Delight, Bashful Blue

Punches: 2-3/8 Scallop Circle, 1-3/4” Circle, Small Oval, Itty Bitty Shapes, Scallop Edge Border

Stamp Sets: Word Play, My Friend, Calendar Alphabet and Numbers, Itty Bitty Bits

Accessories: Sponge Dauber

Wednesday, August 3, 2011

Wonderfully Wicked Wednesday #21

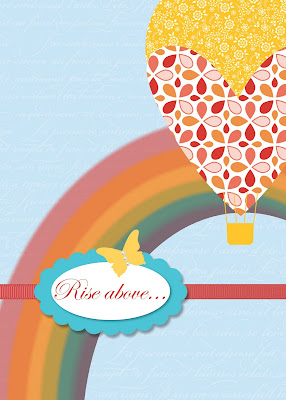
Welcome! I think I've finally recovered from convention brain!  It seems like with all of the swaps to make before convention and all of the sensory overload during convention, it takes awhile to acclimate to regular life again. :)  So this month's theme is Over the Rainbow, and here's what I came up with:


I decided to try out some of the new MDS tricks I learned at convention.  I used a stamp for the basket of the balloon, and a heart punch and a circle punch for the actual balloon.

To make the rainbow, I used a series of circle punches layered behind each other. Each are filled with designer paper, which is then moved outside the punch so that only the drop shadow is left showing.  I moved the shadow to the top left of the punch and copied it for each layer.  The purple layer is the front punch, and I left it filled with the same script designer paper that I used on the card base.

I hope you enjoyed my foray into MDS. Have a great week!

Wednesday, July 13, 2011

Wonderfully Wicked Wednesday—Week 16

I’m off to Stampin’ Up! Convention this week, but here is my entry for the Wonderfully Wicked Wednesday Challenge:

IMG_1868

July’s theme for UDI’s WWW Challenge is “Defy Gravity.” There is no one I can think of who defies gravity more than a cancer survivor.  They defy the gravity of a frightening diagnosis and find the strength to rise up on the wings of hope even when nothing seems hopeful.  With that in mind, I chose to use the Strength and Hope set this week. 

Cardstock: Certainly Celery, Rich Razzleberry, Wisteria Wonder, Very Vanilla

Designer Paper: Pocketful of Posies

Ink:  Rich Razzleberry, Old Olive, Certainly Celery, River Rock.

Punch: Corner Rounder, Itty Bitty Punch Pack

Embellishments: 1/4” Rich Razzleberry Grosgrain, Basic Rhinestones

I stamped the words of comfort stamp across the background first in Certainly Celery and then in River Rock ink.  Then I sponged over the top with Certainly Celery and Rich Razzleberry ink.  I was going for an out-of-focus garden look in the background, but I’m not sure I achieved it. I stamped the Itty Bitty Bits flower and the butterfly in Rich Razzleberry ink and punched the flowers out of Wisteria Wonder.  The “H” stamp is Old Olive ink. I think the rest is pretty self-explanatory, but please feel free to contact me if you have any questions!  I will be at convention all week, but I’ll try to check in when I can.  In the meantime, be sure to check out the Utah Divas International Blog to see what the rest of the WWW design team made this week!

Wednesday, June 29, 2011

Wonderfully Wicked Wednesday!

Welcome to another UDI Wonderfully Wicked Wednesday challenge! This is the final week of the Ruby/Silver Slippers theme, and I spent the morning in the dentist’s office this morning, so I kept my card pretty simple today. 

WWW 15

The Card base is Real Red cardstock, with the background stamp En Francais stamped in Versamark ink and heat embossed with white embossing powder.  I used the Tasteful Trim die to make the Glimmer Paper strips, and the 3” circle die for the black circle.  The white circle was punched with the 2-1/2” circle punch and sponged with Tempting Turquoise ink.  The stamp sets are Full of Life and My Friend, and I used the Owl punch to make the Glimmer Paper heart.

Finally, I used Black 1/8” taffeta ribbon for the bow and popped the circle up with Dimensionals.

I’m going to keep this short today, and go take a nap until the anesthesia wears off and I can feel my jaw again. Open-mouthed smileHave a great week, and be sure to check out the UDI blog to see what the other members of the Design Team came up with!

Wednesday, June 22, 2011

Wonderfully Wicked Wednesday

Welcome to another Wonderfully Wicked Wednesday challenge! This month’s theme is Ruby or Silver Slippers, so I used it as an excuse to pull out the Glimmer Paper and the Brushed Silver cardstock. Add to that some sneak peeks of our new Big Shot die and a new punch, and I really like the way it turned out!
WWW14
I decided to do something a little different with the inside liner. The partial scallop on the right is just the right size for a sentiment stamp from the Teeny Tiny Wishes set.  I haven’t decided who I’m giving this to, so I haven’t stamped it, yet.

Let’s start with the supplies:

Cardstock: Real Red, Whisper White, Brushed Silver
Designer Series Paper: Glimmer Paper
Stamp Set: Grunge Rock
Ink: Real Red
Accessories & Embellishments:  Basic Rhinestones, 1/8” Real Red Taffeta Ribbon, Big Shot, Petals a Plenty Textured Impressions Folder, Tasteful Trim Die, Perfect Pennants Die, Petite Pennants Punch, 1-3/4” Scallop Circle Punch, 1-1/4” Circle Punch. Pewter Metallic Brads, 1/16” Circle Punch, Sponge Dauber, Scallop Circle Die (Inside), Snail Adhesive, Dimensionals, Glue Dots.
I used Real Red cardstock for the base, cut Whisper White Cardstock to 5” x 3.75”, and cut a Brushed Silver cardstock layer at 4.75” x 3.5” before running it through the Big Shot in the Petals a Plenty Textured Impressions Folder.
For the Pendant, I ran a piece of Glimmer Paper through the Big Shot with the Perfect Pennants die to make a circle with scalloped trim around the edge.  I laced the taffeta ribbon through the scallops and held the ends in place with 2 Glue Dots.  Next I used my Grunge Rock stamp set to make my “Real” seal of approval, and punched it with the 1-1/4” Circle punch. I sponged the edges of the circle, added a Brushed Silver Scallop Circle to the back and layered them both on the Glimmer paper circle before attaching the pendant to the card with Dimensionals.
I stamped the diamond background stamp in Real Red ink on Whisper White cardstock, and punched out the smaller Petite Pennants.  Punched holes in the top corners with my 1/16” circle punch, attached them to each other with Brads and used Glue Dots to adhere them to the card.
For the bottom border, I ran a piece of Glimmer Paper through the Big Shot with the Tasteful Trim die, and cut the scallop strip to fit across the Brushed Silver cardstock.
Finally, I added a strip and a half of the Basic Rhinestones across the border and 2 individual Rhinestones to the Pendant.
Inside, I used the Scallop Circle die to cut a piece of Whisper White cardstock for a liner.  It doesn’t fit completely, so I trimmed about 3/4” off and offset it a bit to look like 2 gears. Then I punched some larger Petite Pennants from the edges of the leftover diamond patterned cardstock and sponged the edges for the left side.
I hope you enjoyed my card for this week’s challenge.  Be sure to stop by the UDI Blog to see what the rest of the Design Team came up with! 

Tuesday, May 31, 2011

Wonderfully Wicked Wednesday—Week 13

Welcome! We have a new theme this week for the month of June. It is Ruby or Silver Slippers a la The Wonderful Wizard of Oz or the musical, Wicked.

IMG_1740

I downloaded the pattern from Ellen Hutson’s website, http://www.skiptomylou.org/2008/10/28/paper-witch-shoes/ last summer, and when I saw the theme for this month, I knew I had to try it with glimmer paper. I was delighted to find that it worked very well! The glimmer paper has a vinyl backing, and it actually makes the shoe less susceptible to tearing than cardstock or DSP.  The glimmer paper was carried over from the Occasions Mini, so while it’s not listed in the current Summer Mini, you can still order it. The item # is 121790, and it sells for $3.95 for 2 sheets of 12 x 12.  Because of the vinyl backing, I recommend using sticky strip or glue dots for adhesive. I used brushed silver cardstock for the lining.

IMG_1738

For the embellishment, I ran Brushed Silver cardstock through the Big Shot with the Vintage Wallpaper Textured Impressions Folder. Then I punched out one of the designs with the Scallop Circle Punch.  I used the Boho Blossoms Punch to punch out a Glimmer Paper flower and a Brushed silver center.  I topped it off with a large Basic Pearl.

These shoes make great party favors. You can put candy in a small cellophane bag or pencils or small toys.  A fun and simple project!  Stop by the UDI blog to see what the rest of the design team has come up with this week.

I hope everyone had a wonderful Memorial Day Weekend, and that you were able to take a moment or two (or more!) to give thanks for those who have given their lives to protect us. If you didn’t, take a moment today and hug a soldier or thank a veteran!

Until next week, Happy Stamping!

Tuesday, May 24, 2011

Wonderfully Wicked Wednesday Week 12

Hi everyone! It’s the last week of our theme “Yellow Brick Road,” and with all of the crazy weather across the country, the theme has taken on new meaning for me this week. It’s reminded me that nothing in life is guaranteed, and we can make all the plans and preparations we want, but in the end, we have to take what comes and keep moving forward.

So here’s my card for this week. I finally got away from the road and the poppies.

IMG_1725

Stamp Set: Full of Life

Cardstock: Sahara Sand, Whisper White, Concord Crush, Perfect Plum, Pacific Point, Bashful Blue, Daffodil Delight

Ink: Pacific Point

Fabric: Springtime Vintage

Punches: Fancy Flower, 5-Petal Flower, Boho Blossoms, Itty Bitty Shapes, Ticket Corner Punch, 2.5” Circle, 3/4” Circle

Accessories: Basic Pearls, Big Shot, Flower Die, 3-inch Circle Die, Tearing Edge, Sponge Dauber, Dimensionals, Snail Adhesive


So I used the Flower Die to cut two pieces of the Springtime Vintage Fabric, then I offset them and pasted the yellow 3” circle to them.  I (carefully) removed the corner guard from my ticket corner punch and used it to snip all the way around a white 3” square.  Then I punched out the sentiment and glued it on the front.

I used the tearing edge to distress one edge of the card, and then sponged the whole thing with Pacific Point ink.

I popped the to larger flowers with dimensionals. 

I think the rest is pretty self explanatory, but if you have any questions, feel free to contact me.  Hope everyone’s having a great week, and if you’re in the middle of all of that severe weather, please stay safe and know you’re in my prayers.

Wednesday, May 18, 2011

UDI’s Wonderfully Wicked Wednesday Challenge Week 11—Yellow Brick Road

Welcome to another Wonderfully Wicked Wednesday Challenge! 

This card went through several transformations. In keeping with this Month’s Yellow Brick Road Theme, I was trying to think of things Dorothy and her friends encountered along the way, and I thought of the dark forest full of “lions and tigers and bears!” I thought this piece of Woodland Walk DSP was green enough to represent the land of Oz, and the circles reminded me of the dense foliage of the forest.  They also made me think of those cartoons where you see scary eyes glowing in the dark woods. So I laid a Greenhouse Gala road down through the middle of that dark forest. Then I thought about the Cowardly Lion and his quest for courage, and I used my Garden Green Stampin Write Marker to ink that word in my “Hero” Jumbo Stampin’ Around Wheel.

I had a hard time thinking of what to balance it out with.  My Beautiful Wings Butterflies just seemed a little too “froo-froo” for the boldness of the Courage stamp, so I finally decided to incorporate a sentiment from the On the Grow set, and added a poppy from the Friends Never Fade set.  I think this will be a nice encouragement card to root for someone who’s facing something with an unknown outcome that’s just a little out of their comfort zone like a job hunt, or a big out-of-state move.

Yellow Brick Road-WWW 11

Here are the tools I used:

Cardstock: Garden Green, Whisper White, Daffodil Delight

Designer Series Paper: Woodland Walk, Greenhouse Gala

Ink: Garden Green, Poppy Parade

Stamp Sets: Jumbo Stampin’ Around Wheel-Hero, Friends Never Fade, On the Grow

Ribbon: 1/4” Grosgrain, Daffodil Delight & Old Olive

Punches: 1-1/4” Circle, 1” Circle

I popped both greetings and the flower with Dimensionals

WWW 11-Inside

Inside I used the Eyelet Border Punch to trim the corners, and stamped the flower from Friends never Fade in Poppy Parade and the background diamonds with a stamp from Grunge Rock in Daffodil Delight.

I hope you enjoyed this week’s challenge card.  Check out the UDI blog to see what the rest of the design team came up with this week!

Wednesday, May 11, 2011

Wonderfully Wicked Wednesday—Week 10


WWW 10--Friends Never Fade

Welcome to Week 10 of UDI’s Wonderfully Wicked Wednesday Challenge. We stick with each theme for a full month, so this is the second week of our Yellow Brick Road theme. I tried to think of things you see along the yellow brick road, and there are actually a lot, but for some reason I’m stuck on poppies again this week. Go fig! Open-mouthed smile

So… Here’s the list of items I used:

Stamp Set: Friends Never Fade

Cardstock: Daffodil Delight, Pumpkin Pie, Whisper White, Poppy Parade

Ink: Poppy Parade

Designer Series Paper: Greenhouse Gala, and Sunny Garden

Accessories: Big Shot, Textured Impressions Perfect Polka Dots and Square Lattice Folders, 3” Circle Die, Scallop Circles #2 Die, Basic Pearls, Itty Bitty Shapes Pack flower punch, Snail Adhesive and Dimensionals

I hope you enjoyed my card this week.  Be sure to drop by the UDI Blog to see what the rest of the design team came up with for the theme this week!

Wednesday, May 4, 2011

Wonderfully Wicked Wednesday—Week 9: Yellow Brick Road

Welcome to Wonderfully Wicked Wednesday! We have a new theme this week based on The Wonderful Wizard of Oz and Wicked, the Musical.  This month’s theme is the Yellow Brick Road, and here’s what I came up with:

WWW 9 - Yellow Brick Road2

I was definitely in an “Oz” groove this week, and ironically, now that we’re out of the circles/gears theme, I’ve finally been inspired to use bubbles!  I thought the greeting from the Word Play stamp set worked really well with this theme.  We have the yellow brick road, guiding us toward home and then we have the poppies representing all of the pretty or shiny things we come across along our way that can distract us from our goal.  Pretty deep, huh? LOL!

Here is the list of ingredients:

Cardstock: Garden Green, Certainly Celery, Whisper White, Daffodil Delight, Bashful Blue, Poppy Parade

Ink: Wild Wasabi, Bashful Blue, Baja Breeze, Marina Mist, Pretty in Pink.

Ribbon: 1/4 “ grosgrain Daffodil Delight

Circle Punches: 2-1/2”, 1/2”, Itty Bitty Shapes Pack, Owl Punch

Accessories: Big Shot, Square Lattice Textured Impressions Folder, Basic Rhinestones

I used snail to adhere the road, and the poppies to the Certainly Celery layer. Then I ran it through the Big Shot in my Square Lattice Folder. 

Then I used dimensionals to pop up some of my bubbles, while using snail for others to give it more of a 3-d effect.  The large bubble is white cardstock, sponged with all the various blues listed above as well as a dash of Pretty in Pink.  I added Rhinestones to a couple of the “O’s” in the sentiment.  The smaller bubbles are punched from Bashful Blue cardstock and sponged the same way. Finally, I tied the ribbon around the top two layers, and I’m done!

I hope you enjoyed this week’s card.  Be sure to visit the UDI Blog to see how the rest of the design team interpreted this month’s theme. Have a great week!

Wednesday, April 27, 2011

Wonderfully Wicked Wednesday—Week 8


Hello, Everyone! Welcome to week 8 of Wonderfully Wicked Wednesday.  It’s the final week of this month’s theme, Mr. Wizards Gears and Cogs.  I was all set to use my cogs punch on the final week, but it jammed and I couldn’t do anything with it. As usual, the amazing SU Demonstrator Support is on the job and rushing me a replacement for it, but It didn’t arrive in time for me to finish my card, so, I’m back to vehicles that contain gears! LOL!

WWW 8

This one is pretty simple, but I used some tools I haven’t used before, so it was fun.  I really like the On the Grow stamp set, and I’m looking forward to working with it more!

Cardstock: Crumb Cake, Rose Red, Pink Pirouette.

Ink: Cherry Cobbler, Soft Suede.

Stamp Set:  On the Grow

Embellishments: Basic Pearls, Hemp Twine, 5/8” Grosgrain Early Espresso Ribbon.

Tools: Color Spritzer, Sponge Dauber, Dimensionals, Snail Adhesive, Itty Bitty Shapes Punch Pack, and of course, my Paper Cutter.

I think it’s pretty self-explanatory, but as usual, if you have any questions, please feel free to ask!  Hope you’re all having a wonderful week, and I’m praying that you’re all staying safe during the crazy weird weather we’re having across the country.

Wednesday, April 20, 2011

Wonderfully Wicked Wednesday #7

Hi, everyone!

For week # 3 of Mr. Wizard’s Cogs and Gears theme, I chose to feature the Loads of Love set.  After all, there are definitely some gears in there somewhere, right? 

WWW 7 (2)

So I used Tempting Turquoise, Crumb Cake, and Very Vanilla cardstock.

I ran the Very Vanilla piece through the Big Shot with the Elegant Lines Textured Impressions folder and used a Sponge Dauber to highlight embossed parts with Bashful Blue ink. I used a Blender Pen and Pacific Point, Basic Black, Bashful Blue and Cherry Cobbler inks to color in the truck and the trailer (I thought the card needed an extra load of love!) 

I used the Rough Type set (retired) and Early Espresso ink for the greeting on the front, and I crumpled the cardstock and sponged it with more Early Espresso ink before adhering it to the card.  Then I added two small Eyelets with my Cropadile and tied a piece of Hemp Twine (one strand separated) through the holes.  It’s hard to tell in the picture, but I popped the truck and trailer on Dimensionals.

Inside, I added a layer of Very Vanilla and edged the sides with the Eyelet Border punch. The stamp is from Loads of Love and is stamped with Early Espresso ink.

WWW 7 (1)

I hope you enjoyed this week’s challenge.  Be sure to check out the UDI Blog to see what the rest of the design team came up with!

Wednesday, April 13, 2011

UDI-Wonderfully Wicked Wednesday Week #6


IMG_1562

Hi, everyone! It’s Week 6 of Utah Divas International’s Wonderfully Wicked Wednesday, which uses as its themes elements from The Wonderful Wizard of Oz and the musical, Wicked.  Themes last for an entire month, giving us opportunity to fully explore the possibilities.  This is the 2nd week of the Mr. Wizard’s Cogs and Gears theme, and I mixed two sets: A Sense of Time, and Plane and Simple.

Here’s what I used:

Cardstock: Naturals Ivory, Crumb Cake, Early Espresso

Ink: Basic Black, Early Espresso, Sahara Sand, More Mustard

Embellishments: Antique Brass Eyelets, Linen Thread

Adhesives: Snail, Dimensionals

Tools:  Cropadile, Sponge Dauber

I  crinkled the crumb cake layers and used a sponge dauber to sponge early espresso ink around the edges and across the folds. I stamped the clock hands in basic black and popped them up with dimensionals, and the plane is early espresso ink on crumb cake, but now I’m thinking I should have stamped it in basic black to match the clock hands and the greeting. I used dimensionals on the greeting and the plane, too, and I lightly sponged early espresso around the edges and across the ivory piece everywhere except the clock face. I think it makes an interesting blend of past and present to go with the greeting.

I hope this has inspired you to make your own wonderfully wicked creations! Have a great week everyone!

Wednesday, April 6, 2011

Wonderfully Wicked Wednesday, Week #5

Hi, all!  It's time for Week #5 of  UDI's Wonderfully Wicked Wednesday Challenge.  This week begins a new theme:  Mr. Wizard's Gears and Cogs.  This is one of the photos we had for inspiration:

and here's what I came up with:

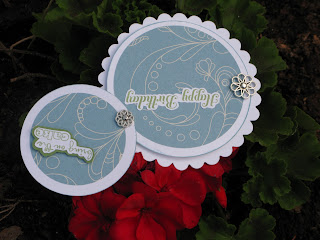
It's a variation on some of the "swivel" cards I've posted in the past where the front swivels up instead of swinging open. In deference to our theme for April, this one, has a few more moving parts...

So here is the list of supplies I used. This was pretty simple to make using the Big Shot.

Ink: Wild Wasabi
Cardstock: Whisper White, Wild Wasabi
DSP: Elegant Soiree
Big Shot Dies: Scallop Circle, Clear Circle, 3.5" Circle, 3" Circle
Punches: 2-1/2" Circle, Large Scallop Circle, 1-3/4" Circle, 1-3/8" Circle
Stamp Sets: Word Play, With All My Heart, Bring on the Cake
Embellishments: Filigree Brads, Metallic Brads
Adhesives: Snail, Dimensionals

So, as I said, this was really pretty simple to make. The trick is to punch the holes while it's closed so that you make sure you're covering up the parts you don't want to show. For instance, the Happy Birthday is actually upside down when everything is closed up, and you don't want the greeting to show under the top circle. Also, mechanically, the 2nd circles from the ends of the string are necessary in order to make sure that the greetings on the end circles remain right-side-up whether the card is open or closed.  I'm really not sure how to explain the rest, so I'll post photos to show you step-by-step how the card opens up, and you can see how everything is layered.  Feel free to contact me if you have any questions!


So there you have it! I had a lot of fun with the theme this week, and I really enjoyed playing with this card.

As you can see by the background, I spent the week gardening because I just couldn't wait any longer, and the flowers and fruit trees are blooming like crazy all around me. So I put out some flowers in the bed outside the kitchen window, and I put a mini vegetable garden in the ground just off the back porch. This morning my mother's hairdresser informed me it's supposed to snow tomorrow... So these photos may be the swan song for my lovely geraniums, not to mention the zucchini and tomato plants, but a girl can hope for spring, right?

Have a great week!

Wednesday, March 30, 2011

Wonderfully Wicked Wednesday Challenge #4

Happy Wednesday, everyone!  This is the last week of March's Challenge using Purple, Green, Black and a neutral.  I cheated a bit this week and used 2 neutrals, but I like the way it turned out.

In anticipation of the new Postage Stamp punch in the coming Summer Mini, I decided to make my own version for the time being by trimming the scallops on the larger Scallop Square in Basic Black from the Scallop Squares Duo Die. I added a Whisper White Layer, and then stamped the Elizabeth stamp in Concord Crush ink on Certainly Celery cardstock before trimming it down for the final layer. It's a little bigger than a postage stamp, but it kind of reminds me of the edging on an old black and white photograph.  I must be very nostalgic this month.  Everything I've made ends up leaning toward vintage! I used my small oval punch for both of the purple ovals.  For the shadow in Concord Crush cardstock, I punched 2 of them and cut one in half.  Then I glued each half on the full one to extend it a bit.  I used a rub on from the Occasions Mini on the Perfect Plum oval and popped them up on dimensionals.

I took the card base of  Confetti Cream and sponged it with Concord Crush ink. Then I used dimensionals to adhere the square to the base.

The Flower uses The Fancy Flower punch, the 5-Petal Flower punch, and the 2-Step Bird punch. (The leaves are the wings!) Colors are Concord Crush, Perfect Plum, and Old Olive.  The center is a Filigree Designer Brad. I stacked 2 dimensionals near the bottom to pop it a little higher than the square.

It's pretty simple, mostly punches and Big Shot with only one stamp set. Hope you like it!

Stop by the UDI blog to see what the rest of the team came up with.  Have a great week!

Wednesday, March 23, 2011

Wonderfully Wicked Wednesday Challenge #3


Hi, everyone! It's Week 3 of  Wonderfully Wicked Wednesday Challenge, and time for another look at our color palette of Purple, Green, Black and a Neutral.

This week I chose cardstock in Perfect Plum, Old Olive and Whisper White. I ran the card base through my Big Shot with the Perfect Polka Dots Textured Impressions folder.  I decided to do a little 2-Step Stamping, and since I'm actually using this card for a group swap, I stamped the flowers and leaves from the Awash with Flowers set randomly on a full sheet of Whisper White cardstock and then cut it in 4 pieces to make fronts for all my cards.  It didn't quite work as well as I'd hoped, but this is one of the better pieces.

I stamped the flower outline in Concord Crush Ink, then used the Baby Wipe technique to stamp the solid flower in Perfect Plum and Old Olive.  The leaf outline is stamped in Old Olive while the solid leaf is in Certainly Celery.

After cutting the White layer, I sponged it with Concord Crush and Old Olive. I added a folded scrap of Striped Grosgrain Ribbon in Basic Black between the top two layers, and  a greeting from the With All my Heart set stamped in Old Olive ink on Whisper White with a Perfect Plum Scalloped Oval behind it. I popped the greeting up with dimensionals.

All in all, a pretty simple card!  Go to the UDI blog to see what the rest of the Design Team came up with today!

Sunday, March 20, 2011

Amy's Card


Here's a card I made for my friend, Amy's, birthday.  She had told me a great story about taking her 3 sons rollerskating for the first time and how great it felt to see the awe on their faces as she gracefully zipped and twirled around the rink. She had obviously been elevated to Super Cool Mom status and felt pretty euphoric.  The story inspired me to make this card, and Amy gave me permission to share it with you!

I used some DSP from the Clearance Rack and Regal Rose and Melon Mambo for the mat layers. I punched a strip of Whisper White with the Scallop Edge Trim punch.

I don't know that I can explain all the punched pieces on the skater, but I can tell you that her shirt is cut freeform from a piece of Perfect Plum Cardstock I had run through the Big Shot with my Petals a Plenty Textured Impressions folder. After that, the body and skates (including the wheels) are made with the Medium Jewelry Tag punch. The elbow and knee pads are made with a circle punch and then I used one of the smaller oval punches to punch out pieces from around the edge of the circle.

Her head and hair is made with a 5/8" x 1-3/8" oval punch.  I used the same punch to make layers in her hair. the top two layers are pieces from the same oval.

Finally, the Helmet was made with the 3/4" x 15/16" Oval punch.

The letters are cut from Schoolbook Serif Alphabet stamped in Melon Mambo on Whisper White cardstock, then mounted on Perfect Plum cardstock and cut freeform with scissors, mounted again on Concord Crush cardstock and cut again freeform with scissors.

I think the rest is pretty self explanatory.  I had a lot of fun playing with this picture, and I have to admit, it came out better than I expected. Happy Birthday, Amy!

Saturday, March 19, 2011

Saturday Sketch #128


The ladies on  the design team for Saturday Sketch at UDI, made some pretty amazing cards with this sketch, and I couldn't resist playing along this week!

Okay, it probably needs a little explanation.  The fishing lines are pretty obvious, but the little bumps at the top are meant to represent the 3 pairs of shoes of the fishers standing on the dock. Cute idea in my head. Not sure I'm happy with this particular version, but I think with a few adjustments, it has potential.  I used Confetti Cream cardstock for the card base and Marina Mist for the mat layer. The dock is Crumb Cake cardstock stamped several times with the Solid Stripes stamp I received for free during Sale-a-bration! I used Soft Suede ink to stamp and sponge the dock. The Whisper White stripe sponged with Soft Suede is meant to be the soles of the 3 pairs of tennis shoes made from 3/4" circles cut in half from Bashful Blue, Basic Black and Real Red cardstock.

I added a greeting from the Something to Celebrate stamp set stamped in Basic Black Ink on a medium Bashful Blue oval, and I took a 3/4" wide strip of Marina Mist cardstock and centered it horizontally in my Scallop Oval punch to make the back layer.  I think it looks a little less "girly" that way, and can make it a more masculine card. I used dimensionals to pop it up.

The hooks are made from Brushed silver card stock using my small oval punch and trimming around them with scissors.  The eyes of the hook are made from a 3-hole punch with circle punch from the Itty Bitty Shapes Punch Pak punched around it. The fishing line is 1/8" taffeta ribbon in Basic Black.

The fish is a small Daffodil Delight Oval with 3 small heart punches sponged with soft suede ink. I used a brass metallic brad for the fish eye.

Finally, I used my Scallop Square punch to make a mask and sponged waves at the bottom in Marina Mist ink.

It's a fun card and I'm really glad I saw the sketch this week!  I think this card will go to my grandnephew who made the Honor Roll this month for the very first time! WOOHOO!  He's very excited because he's been working very hard this year, and I have to say I'm a very proud aunt myself!

If you want to see how the design team interpreted the sketch, go to the UDI Blog.  Hope you're having a great weekend! Come back on Tuesday to see our Wonderfully Wicked Wednesday Challenge using themes chosen from The Wonderful Wizard of Oz and the Broadway musical, Wicked.

Wednesday, March 16, 2011

Wonderfully Wicked Wednesday Challenge #2

Hi, everyone! It's Week 2 of our first WWW theme, using green, purple, black and a neutral.  I used a lot of different colors and stamp sets on this one, so I'm going to list my ingredients first, and then help you figure out where I used them.  I had some issues with my photo this week since it was raining most of the time, and I couldn't get any natural lighting.  At the last minute I was able to catch a shot between downpours, but I'm not sure I got the improved pic to Leslie in time to make a change, so there's no need to adjust your set--the picture on the UDI blog may, in fact, be different!

Cardstock: Certainly Celery, Perfect Plum, Basic Black, Crumb Cake
Ink: Rich Razzleberry, Certainly Celery, Concord Crush, Old Olive, Garden Green
DSP:  In Color Hostess Pack
Embellishments: Glimmer Brad
Punches: Fancy Flower, Spiral Punch, Itty Bitty Shapes, Decorator Label
Stamp Sets: Sense of Time, Itty Bitty Bits, Vintage Vogue
Textured Impressions Folder: Spider Web

The base card is Certainly Celery, and the spiral punched piece is Crumb Cake stamped with Sense of Time in Rich Razzleberry and sponged with Garden Green, Concord Crush, Rich Razzleberry.  I crumpled this piece and the flower before adhering them to the card.  The flower is 2 pieces of Crumb Cake cardstock, punched with the Fancy Flower punch and sponged with Rich Razzleberry ink, then held together by a Razzleberry Glimmer Brad.  I used the ledger sheet pattern from the In Colors hostess pack and stamped the clock face from Sense of Time in Certainly Celery and attached it to a black mat I ran through the Big Shot with a Spiderweb folder.  It's hard to see, but it gives it just a little bit of texture, and helps it stand out.  I popped the mat with dimensionals, and added a cut-out tag with the sentiment stamped in Rich Razzleberry on Certainly Celery cardstock.  The flowers are from Itty Bitty Bits stamped in Concord Crush and punched out. The leaves are  cut out from the Vintage Vogue set, stamped with Old Olive ink.


Check out the UDI blog to see what Leslie, Sarah and Maxine came up with this week!

Wednesday, March 9, 2011

UDI--Wonderfully Wicked Wednesday Challenge #1!!!

I am so excited about Utah Divas International's new weekly challenge!  It's called Wonderfully Wicked Wednesday, and all of the themes will be inspired by The Wonderful Wizard of Oz or Wicked, the musical.  There is SO much fuel for inspiration in these sources.  The other kicker in this challenge is that each theme will last for a full month!  I'm excited about that, too.  While it may be challenging with some themes, I think that's kind of the point, and I think more often we'll find that seeing what everyone comes up with in the early weeks of the month will help us all springboard on to even more exciting creations by month's end! 

Okay, now that I have that out of my system, here's my card for the first week:

The theme for March is Purple, Green, Black and a neutral in any combination.  When you think of it that leaves a lot of room for creativity, since we have 3 purples, 6 greens, and a huge variety of neutrals if you look at the confetti, naturals, and glossy in addition to the Neutrals Collection.  When you look at all those choices, I suppose we can settle for the limitations of having only one black. : )

I used several greens and purples in this one, but I started with a card base of Basic Black and used Perfect Pear cardstock for a mat and layered another Basic Black piece on top that I ran through the Big Shot with the Square Lattice Textured Impressions Folder.

I used my 2-3/8" Scallop Circle Punch to make the Concord Crush circle, and I layered a piece of Springtime Vintage DSP, stamped with the Friends stamp from the Vintage Vogue set.  I have to say that set is one of my favorites!  The big green circle is a piece of Always Artichoke punched with the 2-1/2" Circle Punch and run through the Perfect Polka Dots Textured Impressions folder.

I punched a piece of Perfect Plum cardstock with the 5-Petal Flower Punch and added a flower punch from the Itty Bitty Shapes Punch Pak in Whisper White.  I attached them with a green Glimmer Brad and popped them up with a Whisper White streamer stamped with Certainly Celery and Concord Crush ink from the Vintage Vogue stamp set.

I really enjoyed playing with this theme and can't wait to see what everyone else comes up with and play with it again next week!

Check out the UDI blog to see what the rest of the design team came up with this week!

Sunday, March 6, 2011

UDI Sketch Challenge 126

 Here is the sketch challenge for this week on the Utah Divas International blog.  I was stumped for a bit on this one, until I saw what the design team came up with.  I have to say they really inspired me this week!
It's a Bashful Blue cardstock base with the ducky from Every Little Bit stamped in VersaMark and then run through the Big Shot with the Perfect Polka Dots Textured Impressions folder.

The greeting was stamped with the Sweet Shoppe alphabet set, and the ducky and stars are from the Every Little Bit set. All are stamped in Marina Mist ink. The mats on the greeting are Baja Breeze and the greeting cardstock is Naturals White.  I used the Baja Breeze seam binding ribbon for 2 of the stripes on the sketch.

Lots of fun! Have a great week, everyone!

Check out the samples the design team came up with at http://utahdivasinternational.blogspot.com/2011_03_01_archive.html

Friday, March 4, 2011

UDI Inspiration Challenge 137

Here's the photo for this week's UDI Inspiration Challenge. Looks delicious!  My first thought when I saw this picture was "Great! I'm out of white cardstock..." Then I remembered I have a pack of GLOSSY White! YIPPEE!!! Yes, small things amuse me.  It was perfect to represent the shiny white dishes! The yellows and blues and white in this photo remind me of some of my favorite quilting fabrics, paired with eyelet lace bedskirts and breakfast (or brunch) in bed.

So here's my take on the photo:
This is probably the simplest card I've made in months! The card base is So Saffron The next mat is Marina Mist, and the top mat is, of course, Glossy White.  I brought in a quilting theme by using the eyelet border punch on the bottom edge of the white layer, and adding a Marina Mist Square Lattice diecut, which always reminds me of a double wedding ring quilt.  I added a 1/4" blue grosgrain ribbon secured with a white ribbon slider from Hodgepodge Hardware.  The sentiment is from Teeny Tiny Wishes, stamped in Marina Mist ink on Bashful Blue cardstock and punched with the 1-3/8" by 5/8" oval punch.

See? Simple! and lots of fun. Hope everyone's ready for a great weekend!

Thursday, March 3, 2011

Welcome Baby!


Cardstock:
Daffodil Delight
Pumpkin Pie
Melon Mambo
Whisper White

Punches:
2-1/2 Inch Circle
Fancy Flower
Scallop Oval
Itty Bitty Shapes Punch Pack 4-petal flower

Big Shot Accessories:
Top Note Die
Petals-a-Plenty Textured Impressions Folder
Perfect Polka Dots Textured Impressions Folder

Embellishments:
Basic Pearls
1-1/4" Striped Grosgrain Ribbon-Pumpkin Pie

Stamp Sets:
Sweetness Unlimited
Itty Bitty Bits

Ink:
Pumpkin Pie
Melon Mambo

This card is deceptively simple.  With the exception of the ribbon, everything is either punched or run through the Big Shot.

I used Daffodil delight for the card base, then ran a piece of Pumpkin Pie and Melon Mambo cardstock through the Big Shot with the Top Note die. I took the Melon Mambo Top note and ran it through again in the Petals a Plenty Textured Impressions Folder. Then I trimmed off the perforated edge and used snail to adhere it to the front of the Pumpkin Pie Top Note.  I snipped the ends of the 5-1/2-inch striped ribbon and laid it across the top note, adhering with sticky strip or mini glue dots to help it stick to the textured cardstock.

Next I took a Pumpkin Pie and a Melon Mambo punched flower, overlapped them at one petal and adhered them with a glue dot.  Then I stamped the Sweetness Unlimited stamp on Whisper White Cardstock with Melon Mambo ink and punched it out with the Scallop Oval Punch. I punched a second scallop oval from Daffodil Delight Cardstock, cut it in half and layered it under the white one.  I used glue dots to center the ovals on top of the flowers.

Then I took my 2-1/2" Circle punch and made 2 Whisper White circles, which I then ran through my Big Shot with the Perfect Polka Dots Textured Impressions folder.  I laid them next to each other and used dimensionals to center the flowers over the circles. Then I used glue dots to adhere the circles to the Top Notes.

Finally, I stamped the 4-petal flower shape from the Itty Bitty Bits stamp set several times on Whisper White and punched them out with the Itty Bitty Shapes pack corresponding punch and used glue dots to adhere them around the edge of the scalloped ovals. I used the smallest Basic Pearls in the center of each flower.

Wednesday, March 2, 2011

UDI Color Challenge #25

So, here's the color challenge for this week.  I have to admit as challenges go, this one stumped me more than others have.  Mainly, because I don't think I've ever actually used Basic Gray in anything.  As evidence, I submit the completely empty scrap folder labeled Basic Gray and the fact that I had to open the paper pack to use it in this project.  I'm a firm believer that you can add white to just about any combo and make it work, but if you can believe this, I actually ran out of white cardstock! I'm not exactly sure how that happened...um, yeah.  But I like to stretch my creativity, so after some gnashing of teeth, here's what I came up with.  Not entirely sure I'm happy with it, but I can definitely say that I'm seeing Basic Gray in a new light, and that after all was the point, right?


I used Rich Razzleberry as a base, and Tempting Turquoise for a mat.  I ran my Very Vintage Jumbo Wheel over the Tempting Turquoise in Basic Gray ink.  I had a large scallop square from the Scallop Squares Duo in Rich Razzleberry left over from my Valentine's Day projects with the heart shape punched out of it, so I layered it over the Tempting Turquoise and a square of Basic Gray cardstock, which I ran through the Big Shot in my Square Lattice Textured Impressions folder.

I punched a few 5-petal flowers out of So Saffron, and used the Itty Bitty Punch pack to make the centers from Perfect Plum.  I stamped Thinking of You from Silhouette Sentiments on So Saffron in Rich Razzleberry ink, then punched it with the Modern Label punch.  I ran over all of the saffron pieces with the Very Vintage wheel in Basic Gray.  Then I cut out a butterfly from the Very Vintage Wheel stamp.   I didn't like the way the Turquoise mat looked, so I tore the top and bottom edges and balled up the scraps to make the flower centers.

I think I may try it again and see if I can do something I like a little better, but to the ladies (and gentleman) at UDI, my sincere thanks for helping me stretch my thinking!

Happy Wednesday!

http://utahdivasinternational.blogspot.com/

Friday, February 25, 2011

UDI Inspiration Challenge 136


 So, the snowstorm started a little late and didn't get here until tonight.  It's supposed to last for the next three days, so I'm planning to stay put and play with my paper and ink!  So glad I have some UDI Challenges to inspire me and keep me off the streets and out of trouble!  The above picture is this week's Inspiration Challenge.  They are gumdrops, and the napkin reminds me of those old fashioned paper bags you used to get at the carnival or the circus, or maybe the beach boardwalk filled with popcorn or peanuts or a candy store filled with...hmm, let me think... maybe gumdrops! The gumdrop colors immediately make me think of summer at the beach, and in keeping with the boardwalk theme, Dippin' Dots or shaved ice, a wonderful way to cool off on a hot summer day!


So here's what I came up with.  It's an 8 x 8 Scrapbook Layout that I was planning to use for a swap I'm participating in, but halfway through it I realized I had used  Pink Pirouette for the background and the friend I'm swapping with has 3 boys... um, yeah, I'll be working on another layout before the storm's over.  But that's okay, 'cause I've got time on my hands this weekend!

Anyway, back to the layout, I used a sheet of Poppy Parade DSP to represent the candy strip or popcorn bag, and the white eyelet border reminded me of a candy store doily. I used Pink 5/8" grosgrain ribbon for the bows, and stamped "Summer Fun" with my Sweet Shoppe Alpha set in Melon Mambo and punched each letter with my 3/4" and 1/2" circle punches.  The letters are sponged around the edges with Melon Mambo ink, and raised on dimensionals.

I used the new 3.5" and 3" Circle dies to make the 2 white circles as eventual mats for pictures of my adorable nieces & nephews at the Santa Cruz Beach Boardwalk. For the remaining circles I used Rose Red, Pretty in Pink, Certainly Celery, Marina Mist, So Saffron and Pumpkin Pie along with various Circle punches.  I used my Textured Impressions folders to give some of them dimension and popped them up on dimensionals.  There's still room on the DSP to put another photo or a Journaling tag once I decide what exactly I want to use.

Well, that's all I've got for tonight. Can't wait to see what tomorrow brings! I love the way everything looks with a fresh layer of snow, and we don't get it here very often, so three days will be a treat!


http://utahdivasinternational.blogspot.com/

Wednesday, February 23, 2011

UDI Color Challenge #24


So I decided to play along with today's color challenge from UDI after getting home from my mother's hair appointment and the last minute grocery run to prepare for the snowstorm that's supposed to come through California tonight.  Now I know those of you in the midwest, not to mention Canada and Alaska, are saying to yourselves "What a whimp! Stinkin' California chick wouldn't know real snow if she were buried in it!" and you'd be right.  I live in the foothills of the Sierra Nevadas, and we're billed as being "above the fog and below the snow".  We get anywhere from 2 to 6 inches each year, and it washes or melts away fairly quickly, but this storm is supposed to bring snow to sea level in the Bay Area, and with 2 octogenarians in my care (otherwise known as Mom and Dad), I like to be prepared so that even though I COULD go out, I don't have to until it thaws and I don't have to worry about any of us slipping on the ice!

Okay, back to the challenge: The colors are So Saffron, Blushing Bride, Cherry Cobbler, and Always Artichoke.  They reminded me of the wallpaper in the kitchen of one of my neighbors growing up.  She was my babysitter/adopted grandmother, and I have to say thoughts of her brought back wonderful memories.  The wallpaper was on a white background and had lots of strawberries on it. Anyway, I stepped out of my comfort zone a bit, because I really haven't used Blushing Bride very much, and I loaned out my favorite Textured Impressions Folders last week and won't get them back until tomorrow, so I was left with the Petals a Plenty, which I thought kinda fit the fruit theme if you think of them as fruit blossoms; and my Spiderweb folder, which I guess if you stretch it a bit fits the garden theme, 'cause I always have lots of spiders in my garden.  My first choice would have been the square lattice folder to give it more of a fruit basket feel, but as I said, I loaned it out... (sigh).

I trimmed around the perforation on the Blushing Bride top note, and sponged it with Cherry Cobbler ink, then I sponged Always Artichoke over the texture on the So Saffron circles.  For the fruit I stamped each one once in Cherry Cobbler and once in Always Artichoke.  Then I actually cut out the green stems and pasted them over the red ones.  I have to admit, I questioned my sanity as I was cutting around the cherry stems, but it worked out better than I expected.  I popped the So Saffron layer and the cherries up with dimensionals and wrapped Cherry Cobbler Seam Binding Ribbon around the card base with a finishing bow on the side.  


So, that's how I spent my evening, and now I'm going to settle in and wait for the flurries!  Happy Wednesday, everyone!

Link to Utah Divas International Blog

Wednesday, February 16, 2011

Happy Valentine's Day!

Okay, so Valentine's Day was on Monday and it's now almost Thursday...  I'm running just a teensy bit behind! But I had so much fun making my Valentines this year, I had to share, and I think the ideas are usable with a few tweaks for other occasions, so here's to inspiration!

For my "Grown-up" girlfriends, I made a swivel card using the Big Shot and my Scallop Circle for the back, and the Circle, 3.5" Circle and 3" Circle dies for the front.  I attached the 2 layers with a brad so you can swivel the top open to read the message inside.  I also used the Circle die to make a DSP liner for the inside.
This card has Sunny Garden DSP and is embellished with Rhinestones, a metalic brad, grosgrain ribbon and glimmer paper. The stamp sets are Simply Said and Monogram Sweet.


This card uses the Be My Valentine Stamp from the last page of the Occasions Mini. I stamped it twice and cut out the banner portion and popped it up with Dimensionals.  It's difficult to see in the photo, but I added a couple of Rhinestones in the centers of the flowers on the big heart. I used the small heart punch to make the hearts out of Glimmer paper found on page 7 of the Occasions Mini. The layered flower under the brad is made from the Boho Blossoms punch

 This one uses Victorian Crochet Trim, and Pearls.  I layered the 2-3/8" Scallop Circle punch and 2 Fancy Flower punches with a 1-3/8" Circle punch for the center. The leaves are made with the wing from the 2-step Bird punch. I popped the flower up with dimensionals, and the brad is hidden under the ribbon.
 I used Rose Red Seam Binding Ribbon found on page 16 of the Occasions Mini for the bow and the Scalloped Heart of Hearts Embosslit die for the bottom layer of the monogrammed heart. The brad is hidden under the glimmer paper heart at the top.

The Melon Mambo cardstock is embossed with the Perfect Polka Dots Textured Impressions folder. The 1-1/4" striped grosgrain ribbon is scrunched on a line of sticky strip.  A scrap of Victorian Crocheted trim is layered on top with glue dots.  The Jewelry Tag punch is stamped with 2 different Tiny Tags stamps and tied to the crocheted trim with Linen Thread.  The brad is hidden under the flower.

I used the 3" circle die to cut the Glimmer Paper circle. The Red Satin Ribbon is scrunched on a line of Sticky Strip.  In order to make the sticky strip curve to follow the circle's edge, I clipped it halfway in every 1/4-inch or so.  (Note: This method works well for adhering Glass Glitter, too.) I attached the front to the back with a Glimmer Brad through the center of the layered Boho Blossoms and added pearls to the centers of the flowers.


Here's a view of the inside.  I used Teeny Tiny Wishes to stamp the greeting inside each card.

I hope you enjoyed the Grown-ups Valentines!  I love the variety you can get when you add different embellishments to a few of the same simple foundation pieces.  The kids' cards are coming in my next post!